


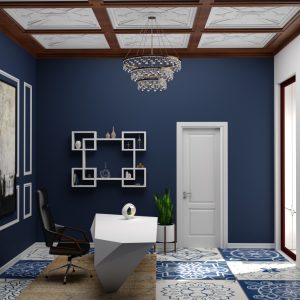
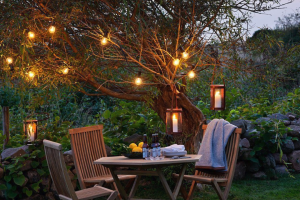


If you’re looking for a way to freshen up your home while also enhancing its ambiance, then a wooden hanging light may be just the solution. Wooden hanging lights are versatile, trendy, and can be designed to complement any decor style. Furthermore, making your own wooden hanging light is not only cost-effective but also allows you to customize it to your liking. In this DIY tutorial, we will guide you on how to make a stunning wood hanging light in a few simple steps.
Materials and Tools Needed
Before we get started, gather the following materials and tools:
- Wooden dowels(4)
- Wooden bead necklace
- Cotton rope or twine
- Corded pendant light
- Sandpaper
- Drill machine and drill bit
- Wire cutters
- Safety glasses
- Ruler or measuring tape
Step-by-Step Guide
Step 1: Prepare the Wooden Dowels
The first step is to cut the wooden dowels in your desired measurement. Cut two dowels to the same length for the top and bottom while the other two should be cut a bit shorter for the sides. Using sandpaper, sand the edges until they are smooth.
Step 2: Drill Holes in the Dowels
Using a drill machine and a 1/2 inch drill bit, drill a hole through the center of each wooden dowel. Ensure that the hole is large enough to thread the rope or twine through.
Step 3: Create the Frame
Slide the twine through the holes of the dowels, starting with the top dowel, then the side dowels, and finally the bottom dowel. Tie knots on each end to hold the frame in place.
Step 4: Add Wooden Beads
Use the wooden bead necklace to cover the twine knots and add an aesthetic effect to your wood hanging light. To cover the knots to any visible wood, thread the back of the twine or rope through the necklace, and pull the necklace up to the knot.
Step 5: Add Lighting
Attach the corded pendant light to the frame by winding its wire around the wooden frame, starting from the top dowel and working downwards. Once you reach the bottom dowel, tightly twist the wire’s end with the wire protruding from the pendant light to make a close-fitting knot. Finally, use wire cutters to remove the extra wire.
By now, you should have completed your beautiful wooden hanging light, which is not only custom-made but also cost-effective. They are versatile and can be included in a wide range of decor types. The simplicity of the steps makes it possible for anyone to create their own wooden hanging light fixture. You now have a statement, piece that will brighten and warm up any space you choose to incorporate it. So go ahead and give it a try!