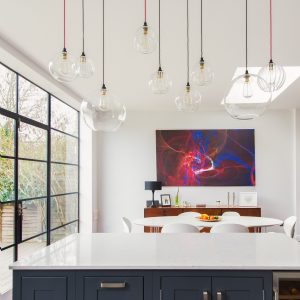


Are you tired of traditional light fixtures in your home? Do you want to add a touch of creativity and personality to your space? Look no further than a DIY concrete light fixture! Not only is this type of fixture unique and stylish, but it is also budget-friendly and customizable. In this article, we will guide you through the process of creating your own concrete light fixture and provide tips for making it fit seamlessly into your home decor.
Materials and Tools
To make your own concrete light fixture, you will need the following materials:
- Concrete mix
- Water
- Metal wire mesh
- Plastic or rubber gloves
- Light bulb socket and wiring
- Spray paint or concrete sealer
In addition to these materials, you will also need the following tools:
- Bucket or mixing container
- Stirring tool (ex. a wooden dowel or paint stirrer)
- Wire cutters
- Pliers
- Painter’s tape
- Sandpaper
- Power drill
- Concrete drill bit
Step-by-Step Instructions
1. Prepare your work area
Before you begin mixing the concrete, it is important to prepare your work area. Lay down plastic or newspaper to protect your floors and surfaces. Wear gloves to protect your hands from the concrete mix.
2. Mix the concrete
Follow the instructions on the concrete mix packaging to mix the concrete with water. It is important to mix thoroughly, but not to overmix, as this can weaken the final product.
3. Cut and shape the wire mesh
Using wire cutters and pliers, cut the wire mesh to the desired shape and size for your light fixture. Bend it into the shape you want your fixture to be, leaving space for a light bulb socket in the center. Use painter’s tape to secure the wire mesh in place.
4. Pour the concrete
Slowly pour the mixed concrete into the wire mesh mold, tapping the mold gently to ensure it settles evenly. Fill the mold to the desired thickness, leaving enough space for the light bulb socket.
5. Insert the light bulb socket
While the concrete is still wet, insert the light bulb socket and wiring into the center of the mold. Allow the concrete to dry completely.
6. Sand and seal the concrete
Once the concrete is dry, sand any rough or uneven edges with sandpaper. Optionally, you can spray paint or apply a concrete sealer to protect and waterproof the fixture.
7. Install the fixture
Using a power drill and concrete drill bit, drill a hole in the ceiling or wall where you want to install the fixture. Insert the wiring through the hole, and connect it to a light switch. Mount the concrete fixture to the ceiling or wall using screws or brackets.
A DIY concrete light fixture is a simple way to add a unique touch to your home decor. With just a few materials and tools, you can create a stylish and functional fixture that complements your space. By following these step-by-step instructions, you can make your own concrete light fixture with ease. So get creative and illuminate your home with style and personality!