


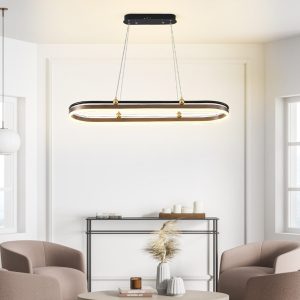


Lighting is a crucial part of any interior design, as it can set the mood and provide practical illumination for daily activities. However, buying pre-made lamps can be expensive, and they may not always fit your personal style or needs. For those who enjoy DIY projects, making your own wooden wall lamp can be a fun and rewarding project. Not only will you have a unique piece that adds warmth and character to your space, but you’ll also have the satisfaction of creating something with your own hands. In this article, we’ll take a closer look at how to make a wooden wall lamp that’s perfect for a rustic or farmhouse-style home.
Materials and Tools
Before diving into the steps to create your own wooden wall lamp, it’s important to gather all the necessary materials and tools. Here’s what you’ll need:
- A plank of reclaimed wood, approximately 1 inch thick and 12 inches long
- A table or circular saw
- A drill
- A jigsaw
Step-by-Step Instructions
Step 1: Cut the Wood
Using a saw, cut the reclaimed wood plank to the desired size. We recommend a length of 12 inches to fit the lamp kit, but you can adjust the size according to your preferences. Sand the edges and surface of the wood using a rotary tool to create a smooth finish.
Step 2: Create the Lampshade
Using a jigsaw, cut out a rectangular shape from the center of the wood plank, leaving approximately an inch border around the edge. This will create a frame for the lampshade. Sand the edges of the cutout using the rotary tool.
Step 3: Drill the Holes
Drill a hole in each corner of the cutout, using a drill bit that’s slightly larger than the lamp kit cord. Sand the holes to create a smooth finish.
Step 4: Attach the Lamp Kit
Following the instructions included with the lamp kit, thread the cord through the holes in the wooden frame, leaving enough slack for the socket to hang below the frame. Attach the socket and wiring to the cord, and fasten the socket to the bottom of the wooden frame.
Step 5: Glue the Lampshade Together
Apply wood glue to the edges of the wooden frame, and clamp the cutout piece in place to create the lampshade. Let it dry according to the instructions on the glue bottle.
Step 6: Apply the Finish
Once the glue is dry, carefully remove the clamps and apply Tung oil or another finishing product of your choice to the wooden lampshade. Let it dry completely before attaching the light bulb and plugging in the lamp.
Making a DIY wooden wall lamp may seem daunting, but with the right tools and materials, it’s a straightforward project that can add warmth and character to your home. By using reclaimed wood and a minimalist design, you can create a rustic or farmhouse-style lamp that fits your personal preferences. Not only will you have a unique piece of decor, but you’ll also have the satisfaction of creating something with your own hands. With some patience and creativity, you’ll have a beautiful and functional lamp that enhances the ambiance of your space.